Introduction
Updating the door handles throughout your home can significantly transform its overall appearance and atmosphere. This comprehensive guide aims to empower you with the knowledge and confidence to undertake this home improvement task on your own, without the need for professional help. While replacing door handles on existing doors might present challenges due to pre-existing screw holes and latch placements, installing them on a new door is a straightforward process. Leveraging the step-by-step instructions provided by Carlisle Brass, a leading manufacturer of door hardware in the UK, this guide ensures relevance across the Carlisle Brass range, including Serozzetta and EuroSpec, as well as most door handles fitted on either square or round roses.


Understanding Door Handles on a Rose
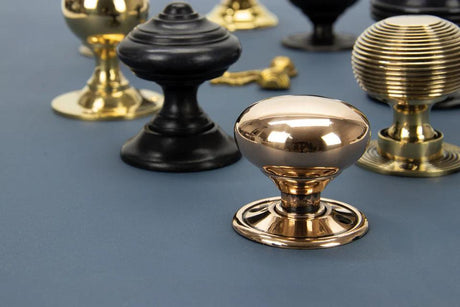
A door handle on a rose offers a sleek, modern look that can enhance the aesthetic appeal of any room. The term "rose" refers to the round or square plate or disk that sits flush against the door, from which the handle extends. Not only does this design contribute to a cleaner and more contemporary feel, but it also provides a minimalist backdrop that allows the handle itself to stand out. Carlisle Brass, one of the largest manufacturers of door hardware in the UK, offers an extensive range of door handles on a rose that are designed to fit seamlessly into any interior design scheme. Whether you are updating your bathroom, bedroom, or front door handles, choosing a rose design can bring a touch of modern elegance to your home.
Preparing for Installation
Before beginning the installation process, it is essential to gather all necessary tools and materials. Most door handle kits, especially those from Carlisle Brass, include all the components you'll need, but verifying this ahead of time can save you a trip to the hardware store mid-project. Essential tools typically include:
- A drill with a 20mm diameter bit for the main hole and a 5mm or 2mm bit for the fixing holes, depending on the type of fixing.
- A bradawl for marking drill points accurately.
- A screwdriver for securing the fixings.
- The door handle kit, which should contain the handles, spindle, fixing screws or bolts, grub screws, and rose covers.
Familiarizing yourself with the components in your door handle kit is crucial. The Carlisle Brass kits come with clear labeling and instructions, making it easier to understand how each part fits into the installation process.
Step-by-Step Installation Guide
Marking the Door
To ensure a precise installation, the first step involves marking the door for drilling:
- Use a bradawl to mark the center hole (A), then the fixing holes (B) at 38mm centers. This initial step is crucial for aligning the handle correctly with the door mechanism.
Drilling the Door
Once your marks are in place, proceed to drill the holes for the handle:
- Drill the center hole (A) using a 20mm diameter bit at the marked center location.
- For bolt-through fixings, switch to a 5mm bit and drill the fixing holes (B1 and B2) at the 38mm marks.
- For face fixings, use a 2mm bit to drill pilot holes (B) to a depth of 5mm.
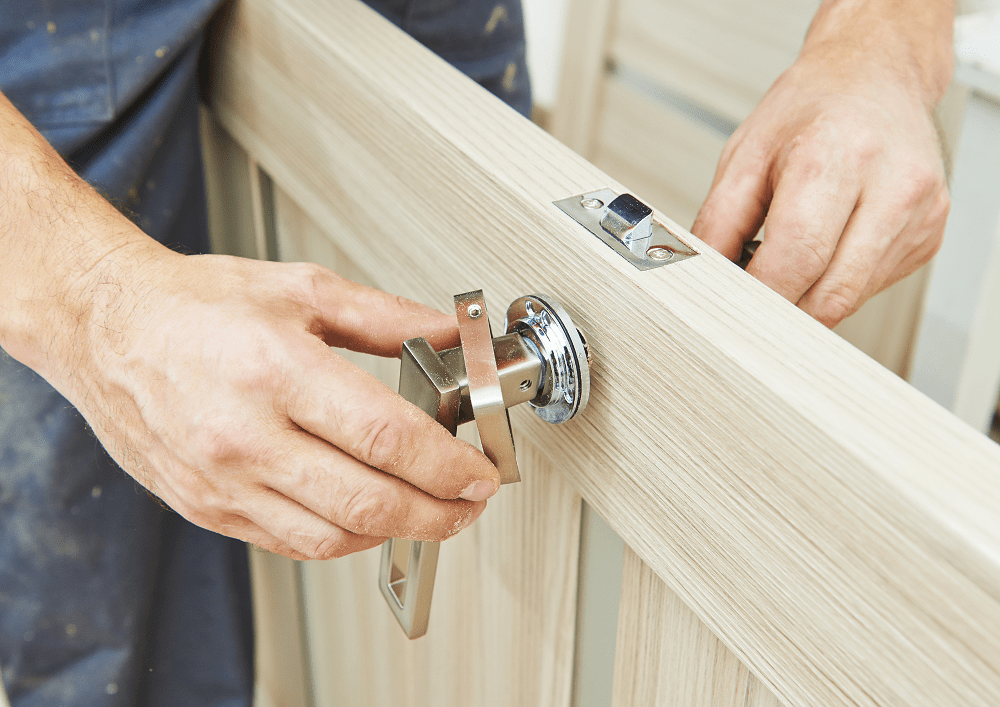
Fitting the Spindle and Levers
With the holes drilled, it's time to assemble the handle mechanism:
- Insert the spindle through one of the levers, securing it with the grub screw to ensure there's enough spindle length to pass through the door and into the opposite lever.
- Position the lever assembly onto the door, aligning the spindle with the latch/lock follower and the rose holes with those drilled into the door.
- Attach the second lever on the opposite side of the door, following the fixing method suited to your door handle kit:
- For bolt-through fixings, insert and hand-tighten the bolts to secure both levers against the door.
- For face fixings, start by hand-tightening the screws on one side before moving to the opposite side.
Securing the Fixings
The final steps involve ensuring all components are tightly secured:
- Tighten the grub screw on the opposite lever and double-check all fixings. If the levers don't operate smoothly, re-examine the alignment of all parts and adjust as necessary.
- Finally, attach the outer rose covers by screwing them onto each side, covering the mechanism and providing a neat finish.


Special Considerations
Bathroom Door Handles
When updating bathroom doors, adding a Bathroom Turn and Release below the handles can enhance privacy and functionality. This feature is easy to integrate during the handle installation process and ensures your bathroom door is both stylish and practical. To see the bathroom Turn collection on our website click here
Door Handle on a Rose Locking
For external doors or internal doors that require locking, incorporating mortice locks and keyhole covers (escutcheons) is essential. This additional step ensures your doors are not only aesthetically pleasing but also secure. Following a dedicated guide for installing these components can provide extra peace of mind. To see the Escutcheon collection on our website click here
Why Choose Door Handles on a Rose?
Choosing door handles on a rose not only elevates the aesthetic appeal of your home but also offers versatility in design. This style of handle fits seamlessly with modern, minimalist, and even traditional décor, making it a popular choice for homeowners looking to refresh their interiors. The clean lines and hidden fixings associated with rose handles provide a sleek, contemporary look that can transform the appearance of any door. Moreover, the wide range of designs and finishes available from manufacturers like Carlisle Brass means there's a perfect handle to complement every interior style and personal preference. At Trade Door Handles we over over a thousand door handles on roses in various styles and finishes for all tastes, click the link below to see our collection.
Troubleshooting Common Issues
Even with the most meticulous installation, you may encounter some common issues with door handles on a rose. Here are a few tips for troubleshooting:
- Loose Handles: Check and retighten grub screws and fixings. Over time, these can loosen with use. Make sure that the bolt fixing have been used
- Misaligned Handles: Ensure the spindle is correctly inserted and that all fixings align with the drilled holes. Misalignment can prevent smooth operation.
- Stiff Operation: This may indicate overly tight fixings or misalignment. Adjust as necessary for smooth, free movement.
Maintenance and Care
To ensure your new door handles remain functional and visually appealing, regular maintenance is key. Wipe down your handles with a soft, damp cloth to remove fingerprints and dust. Avoid harsh chemicals or abrasive cleaners, as these can damage the finish. For handles installed in high-traffic areas, periodic tightening of screws and grub screws can prevent loosening over time.

Conclusion
Fitting door handles on a rose to your new door is a project well within the reach of most DIY enthusiasts. With the right tools, careful planning, and attention to detail, you can achieve professional-looking results that significantly enhance the look and feel of your home. Remember to follow the specific instructions provided with your door handles, as there can be variations between different brands and models. Whether you're updating a single door or refreshing the hardware throughout your home, the switch to door handles on a rose offers a modern, sophisticated touch that you'll appreciate for years to come.
FAQ Section
What is a "rose" in door handle terminology?
A rose is a circular or square plate on which the door handle is mounted, sitting flush against the door's surface for a sleek, finished look.
Can I install a door handle on a rose by myself?
Yes, with basic DIY tools and a careful approach, most homeowners can successfully install a door handle on a rose without professional help.
How do I choose the right door handle on a rose for my door?
Consider the door's design, the room's aesthetic, and the handle's functionality. Manufacturers like Carlisle Brass offer a wide range of styles to suit various preferences and needs.
What should I do if my door handles are not aligning properly?
Recheck the alignment of the drill holes and the positioning of the spindle. Adjustments may be necessary to ensure a smooth operation.
Are door handles on a rose suitable for all types of doors?
Yes, door handles on a rose can be installed on most interior doors. For exterior doors, ensure the handle comes with the necessary security features.